When AI Gets Goosebumps


(CC BY-NC-SA 4.0)
Because the last three days were so intense, I’ve decided to share a couple images that came up in my photo memories because of my recent topics on mountains. These were made in the Abstract Fluid and Kintsugi filters; I really love the colors, and especially the gilded edges, on these pictures.
As for the goosebumps, I just had to share the laugh that when I presented my last blog post for editing (part 3 of the Upside-down Mountain posts), Gemini didn’t find any corrections and said the post gave it “literal goosebumps.” A play on words because it’s literary, or a test to see if I’d catch the word literal and say, ” No you didn’t”? I don’t know, but at least it gave me a good smile and laugh. And I’m very happy that Gemini saw the value and hard work I’d put into that post—and all the posts on that subject.
Of course, I was really tired having been up for hours trying to fix a ghost notification on hubby’s phone that was going off every 2 minutes and then showing nothing in the pull-down notification screen. I need to tell you how to fix it in case it ever happens to you. This is an Android issue, and maybe even Samsung-specific.
So, I tried deleting files. I tried updating the Samsung password since my account fuels every Samsung device in the house and it was warning me that it had been 6 months since the last update. I tried every setting I could find that had to do with that notification, and nothing worked. That’s when Gemini came to my rescue.
First, it had me check to see if I was using message/notification reminders where they periodically pop back up if unanswered. Nope; that was clear. Then came a few more tweaks in notifications, privacy, and accessibility, but still: sounds with no words, every 2 minutes exactly. I knew that phone was not an airplane but would likely be tested that way if it kept it up when hubby got up the next day. So, like a bulldog with a bone, I kept digging.
Really, it’s not as hopeless as it would seem. And part of that is due to a very smart app Gemini told me to download from the Galaxy Store. It’s called “Nice Catch” and it can record all the little changes to your phone with about 7 hours of history. And the developer made it free!
Once I got the download open, I switched on the main toggle (and then every toggle) just to try and find the phantom annoyance. Within 2 minutes, the first one came up. And then 2 more, exactly at 2-minute intervals. They were repeats of the flash flood warning that had hit our area the previous morning when 8 inches of rain dropped in 1 hour. Once we had that info, Gemini was able to direct me to the exact setting that was creating the notifications.
If you have a Samsung smartphone, and especially if you’ve ever gotten random notifications with no visuals, this app works. With or without that app, though, here are the steps for making sure your phone’s emergency notifications are set exactly as you want them. I’m guessing these will be close to the same for every Samsung Android device. Go to…
- Settings (the gear ⚙️ icon)
- Safety and Emergency
- Wireless Emergency Alerts
- Alert Reminder (It will likely say 2 minutes by default, and you can change it to once, 15 minutes, or never.)
Other settings on this page include setting your emergency alerts to full volume even when the phone is on Do Not Disturb, and having the alerts spoken to you.
I will research more for my own phone as I’ve found articles saying the Nice Catch developer, “Good Lock” has lots of great customizations in their app suite. Comment below if there’s something you think I should know about or would be interested in. Thanks!
Share this post on:

Creative Ways to Deal

(CC BY-NC-SA 4.0)
This is blog post number two because after I had blog post number 1 completed, my check of links revealed that it wasn’t the best idea to share. I was going to tell you all where to get my free phone wallpapers from Zedge, but the link to the regular website is so different from what I see within the app, it became clear I could not share it. Third party ads with misleading statements about activating your account could’ve made it look like that’s what you needed to do in order to grab my creations, and I just couldn’t serve that info with a clear conscience. I did find an alternative I’ll begin working on to share here later, though.
The other issue was that I had put some sample images in a collage, so people would know what they could expect. As it turns out, even though AI images cannot be copyrighted at this time, the terms of service (TOS) for using Zedge pAInt to design includes not being allowed to use those images on a blog or external website, even if it’s not monetized and is only being used to send people to them. 🙃
So, today’s blog post is a lesson for me, and it can also be for you all to learn from my “almost” mistakes, so none of my readers will risk their own violation of a site’s terms. The big lesson being, even if you know the basic rules, ALWAYS read the TOS for the specific user practices they demand. In the meantime, enjoy the collage of peaceful doves, flowers, and butterflies made in Wombo where they have much more user friendly terms.
And here is one more collage of dove images using the following prompt:
2 white peace doves nestling on colorful flowers with deep royal reds, purples, blues, and greens all with gilded edges. A layer of deep green leaves with gilded edges and veins sits beneath the flowers. Soft glittery rays of sunshine stream from fluffy white clouds in the corner and bathe the doves and flowers. One large butterfly made of stained glass hovers near the doves, and many tiny colorful butterflies flit and sparkle throughout the scene.

(CC BY-NC-SA 4.0)
Use that prompt in your favorite AI image generator and then let me know where I can see what you’ve created. In the meantime, have a really creative day!
P.S. The “How to Deal” in the title was about dealing with extreme nerve pain in my back and leg (detailed in the first post), and how that led me to being creative as a way of dealing with what I could not do. Plus I got notes on my phone from apps saying, “Hey, look what we can do now!” It was a good day to be creative, but since it ended up taking me all night to do so, and since I actually wrote 2 posts, I’m officially skipping what would have been published as the date of May 24th and bringing you this for May 25th. Maybe that will set me on a better path forward. Now it’s time for some sleep for me. 😴
Psalm 4:8 BSB
[8] I will lie down and sleep in peace, for You alone, O Lord, make me dwell in safety.

https://bible.com/bible/3034/psa.4.8.BSB
Share this post on:

🎵No Fear Invited
Well, this one is turning out to be a much bigger presentation and study than I planned, so I’m not going to do the whole thing just yet. But let the Scripture above (placed on a real Indiana sunset) be an encouragement for you.
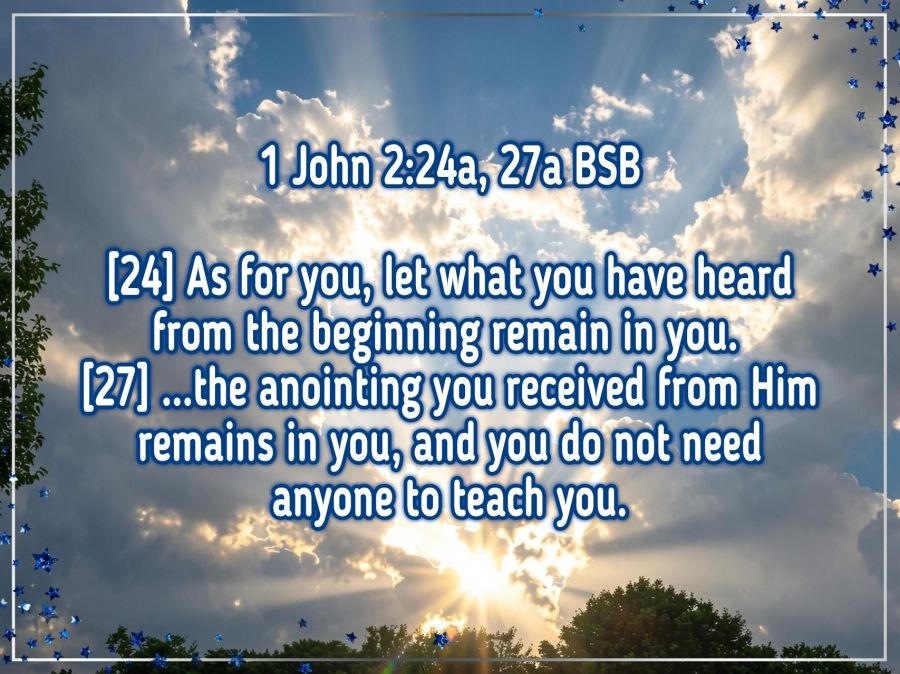
1 John 2:24, 27 BSB
[24] As for you, let what you have heard from the beginning remain in you. If it does, you will also remain in the Son and in the Father.
[27] And as for you, the anointing you received from Him remains in you, and you do not need anyone to teach you. But just as His true and genuine anointing teaches you about all things, so remain in Him as you have been taught.

https://bible.com/bible/3034/1jn.2.24-27.BSB
Remember what you have been taught from God’s Word. Search your heart for those truths God Himself has hidden there by His Spirit. Do not be misled, either in knowledge or emotion, by fearful words being shared in the name of Christ. Ask for, and practice, discernment. Paul reminds us that practicing discernment makes us better at it.
Hebrews 5:14 BSB
[14] But solid food is for the mature, who by constant use have trained their senses to distinguish good from evil.

https://bible.com/bible/3034/heb.5.14.BSB
If you’ve begun to hear the fearful whispers about UFO/UAP “secrets” being revealed that will challenge your beliefs in God, plan now to not be overwhelmed by the news. Do not invite the fear to dwell in your heart. Know that God is The Creator of the WHOLE universe, so that includes any and all entities that may be outside our visual realm here on Earth. Trust The Lord and do not doubt that He has everything in His hands and in His control. He has already been to the future and nothing takes Him by surprise. No matter how anointed someone says they are or seems to be, they do not have more knowledge (gnosticism) than God or His Word, so keep your heart in The Lord, and send fear on down the road.
There is much more to say on this subject, but I want my presentations to be accurate and truthful, so I will add to this when I have spent more time in prayer and Bible study. But I wanted to get the introduction to you as I’ve been seeing more and more talk of these things, and Christians need to be prepared to carry the banner of God’s Word in comfort and strength to those who do not yet follow our Savior and may be overcome with fear. Keep yourselves in The Word and Spirit, so you will have truthful answers for any who might ask your thoughts on these teachings when they are dispensed to the masses.
Share this post on:

A Circle of Secrets (Telephone Part 2)

Yesterday, I talked about the dangers of misunderstood communication (with the game of Telephone as an example). And I promised I’d share how that can influence and change the church. For example, the Bible doesn’t say “Cleanliness is next to Godliness” anywhere in Scripture. I’ve heard that it is actually in the Jewish books of wisdom, though. But it made it into regular church vernacular enough that many of us grew up thinking it was in the Bible.
Also, it never says there were 3 wise men, or that the wise men were kings, and yet we sing about it every Christmas. Oh, but wait, it doesn’t say a thing about Christmas either, but we can be relatively certain that December isn’t the correct season for the miraculous birth of Messiah. Yet, we create full programs and times of devotion around the season. And we surround our manger scenes with “angels” wearing halos not knowing that the word “halo” comes from the Greek word “Hélios” meaning “sun” and from the practice of sun worship.
The Bible does say to study to show yourself approved, and it warns that the ignorant may twist words (in the case of the Scripture reference, Paul’s words) to their own destruction.
2 Timothy 2:15 NLT
[15] Work hard so you can present yourself to God and receive his approval. Be a good worker, one who does not need to be ashamed and who correctly explains the word of truth.

https://bible.com/bible/116/2ti.2.15.NLT

2 Peter 3:16 CSB
[16] He speaks about these things in all his letters. There are some things hard to understand in them. The untaught and unstable will twist them to their own destruction,  as they also do with the rest of the Scriptures.

https://bible.com/bible/1713/2pe.3.16.CSB
I’m not saying these things in fault-finding accusations or demanding that people stop celebrating Christmas or singing We Three Kings, but rather I’m sharing as a wakeup call to understand how quickly and easily truth can be distorted until it looks totally different. There’s a great article about 8 things many believe after having been taught incorrectly at Christian Publishing House and it even included one I was taught and believed, but nope, there is no archeological or historical evidence of a gate in Jerusalem called “The Eye of the Needle” where camels must be unloaded before they can pass through. Of course, there are way more than 8, but this should stir Christians to seek truth and not just take what they’ve been taught to hear without first using research and prayer to confirm it.
One of my personal issues is found in the statements of faith for almost every church and religion. It’s the oft-repeated phrase “God in three persons,” also used in the song “Holy, Holy, Holy,” which is unsupported by Scripture many times, but especially in Colossians 2:9 where it says…
Colossians 2:9 CSB
[9] For the entire fullness of God’s nature dwells bodily in Christ,

https://bible.com/bible/1713/col.2.9.CSB
God does reveal Himself in a triune nature, but only one body (person), and the three are One…
1 John 5:7 KJV
[7] For there are three that bear record in heaven, the Father, the Word, and the Holy Ghost: and these three are one.

https://bible.com/bible/1/1jn.5.7.KJV
But we would never say “God in three spirits” or “God in three fathers” so why do we say “God in three persons”? And it does matter because there’s a huge difference in “these three are One” and “this One is three.” The latter supports multitheism and can cause those raised in monotheistic religions to refuse to seek the grace and mercy of Christ that Christianity teaches. These three are One being (and in only one human person) does not deny the Tri-Unity/Trinity, but rather defines it according to Scripture. And it makes it even more clear how we are made In His Image since we also have one body, one soul, and one spirit that all dwell fully as one being inside one body. And it clarifies the juxtaposition of the two verses in John 14:16 and John 14:18 where YahShua says He will ask the Father to send The Comforter and then says “I will come to you.”…
John 14:16, 18 KJV
[16] And I will pray the Father, and he shall give you another Comforter, that he may abide with you for ever;
(VERSUS)
[18] I will not leave you comfortless: I will come to you.

https://bible.com/bible/1/jhn.14.16-18.KJV
But somewhere along the line, the spiritual game of Telephone created these and many other mistaken understandings. Too many people are okay to start rumors, like whoever started all the ones about atheist Madalyn Murray O’Hair wanting to take religious programming off radio and TV. They later added that Dr. Dobson requested signed petitions to prevent it. And that hoax became so widely circulated that the FCC had to create a special phone number just to deal with calls on that subject. The hoax said they needed 1 million petitions to the FCC, and the FCC said they quit counting when it reached 25 million. That was in 1994. While it’s good that so many Christians are passionate about our religious freedom, this also shows how prominent a lie can become. It was one I also believed many years ago as a new Christian.
Too many are content to believe things at face value when they come from a trusted source. I’ve mentioned in other posts that I believed the Neiman Marcus cookie hoax because I heard it at a Tupperware meeting where I trusted the leadership sources. But every one of us needs to seek truth and guard it when we find it. With AI growing, it’s getting harder to tell real stuff from deep fakes, so all of us must be careful both inside and outside the spiritual realm. I’m beginning to understand how spiritual changes have taken place for so many years, even centuries back when Israelites believed untruths presented by someone with a loud voice or high position. Will you join me in becoming a truth seeker no matter how many waves it creates?
And just to end on a lighter note, I found an article with all kinds of ideas for the Telephone game (also called Chinese Whispers) at https://k12loop.com/hilarious-broken-telephone-game-phrases-prompts/ and that makes me want to play the game again.
Share this post on:

Playing Telephone on a Bridge

Why a bridge? Because George Washington Bridge opened on this day in 1931 connecting New Jersey and New York City. And I wonder… Did they choose this day (April 30th) because on the same day in 1789, George Washington was inaugurated as the first US president? It’s an interesting coincidence either way.
So, do you remember playing the game of Telephone? The one where you whisper a phrase in someone’s ear, who then whispers what they heard in the next person’s ear, who repeats the action until the secret gets to the final person in the circle? Yeah, that game where coming up with a set of words likely to be misheard is as much fun as finding out how messed up the message got by the end. Read more at Grokipedia. (Even though it’s AI, I’d rather share that than the other after so much had been found to be manipulated there.)
So, I’ve been trying to learn a bit from, and about, AI. And I’m realizing that AI is like playing a giant game of Telephone. All of the AI models are “trained” with large amounts of data, most of which were initially created with intention. But in addition to their initial datasets, they are also out there gathering data from what people, and possibly other AI, put out. That’s why so many people are putting up virtual walls to demand that their intellectual property cannot be scraped up and used. But that’s a different subject for a different day.
Hubby sent me an article about a guy who “hacked” an AI by providing false data for it to consume. The BBC journalist created a blog post about a non-existent hot dog eating contest and his record-breaking success at said contest. With some good marketing tricks, the contest and his win became “verified” information in response to the right search query. It’s a fascinating article I recommend reading in full if you get the chance. The journalist created the hack when he found out how companies are doing that very thing to raise their ranks on search results. And he says in the article: “I reviewed dozens of examples where AI tools are being coerced into promoting businesses and spreading misinformation. Data suggests it’s happening on a massive scale.”
The idea that info passed along can get misinterpreted is dangerous, and it’s why I’m so concerned about seeking truth and accurate information about what’s out there—especially concerning health and biblical things. I’ve said before that I am like that little girl asking her mom and grandma why they cut the ends off the ham. When the truth came out about the great-grandmother having a small pan, generations had been using the cutting preparation as if it were some learned secret that made the meal better. I’ve gotten in trouble more than once for asking questions instead of just taking things as people say them. But I’m okay with that because truth is taking a hit these days, and that concerns me.
As I do my own Bible study, I find lots of truths that never get mentioned from the pulpit. But this is getting long, so I’ll continue the message with the spiritual aspects of this tomorrow.
John 8:12, 30, 32 BSB
[12] Once again, Jesus spoke to the people and said, “I am the light of the world. Whoever follows Me will never walk in the darkness, but will have the light of life.”
[30] As Jesus spoke these things, many believed in Him.
[32] Then you will know the truth, and the truth will set you free.”

https://bible.com/bible/3034/jhn.8.12-32.BSB
Share this post on:


My Own Creative Muse

Like the character Cameo in yesterday’s story, I feel like I have the voice of a “muse” in my mind that drives me to create. Unlike Cameo, I haven’t turned away from that voice completely, though I’ve gone through dry spells. Maybe that’s why the story came to me and made me examine the relationship between our thought lives and our real lives. And if you ever battle with the still, small voice like Elijah, maybe Cameo’s journey will be enjoyable for you as well.
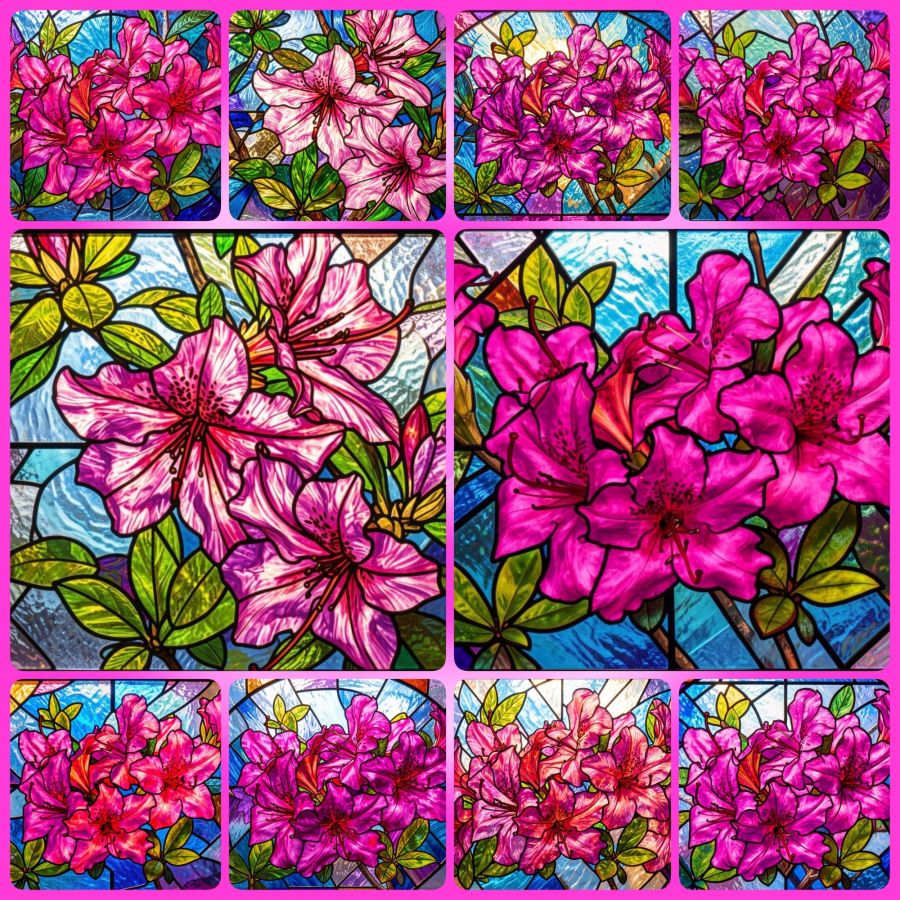
Though it’s not time to share more of her story yet, I want to share just a little from recent creative endeavors. The above photo is a close-up from the first good blooms on an azalea plant hubby got for me a few years ago. He did the research to find out what would make it grow, and it paid off well. I’m thrilled with the plant and with the pictures. I added a sparkly frame on this one because I knew how it would affect the images I got from Wombo Dream AI. Get ready for a barrage of pink and full instructions for any why might want to try designing images in Wombo.
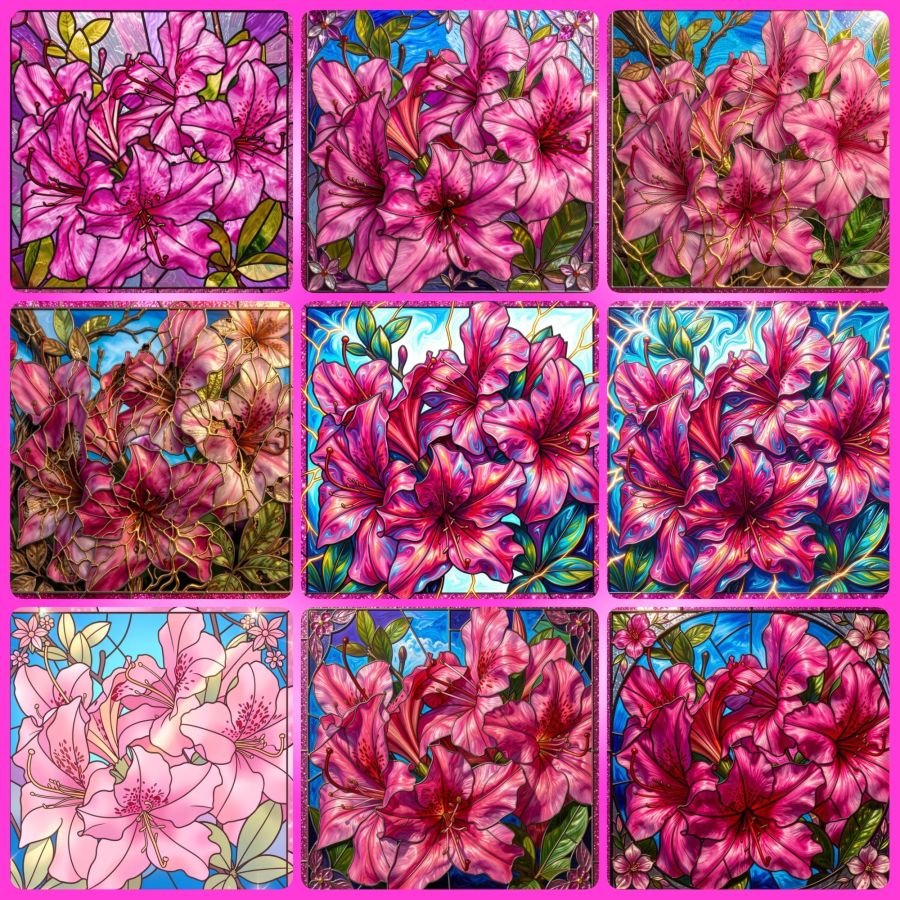
So my first stop was to their browser page because they recently updated it with a new “edit” button. You can upload an image, and then tell it how you want it edited. Maybe you want the flowers in purple or the sky in green. Put your thoughts in the prompt box, and let it go to work. I told it I wanted the image in stained glass. The outputs were the same in the app as in the browser, so here are some from the app before I added the frame…
You can visit the website without downloading the app, so you can make your own fun edits at https://dream.ai/ and click on the “Start Creating” button. On the creation page, you can use my prompt (below) if you like, or create your own. When you add a prompt, you’ll notice a button that says enhance. That button will add some fancy extra prompts that are well trained into the AI. Once you have the prompt you want, it’s time to select a filter. Anything that doesn’t say “Premium” is okay to use. The latest filters are V4, and the V3 filters also work well. Once your filter is selected, you can choose generate to make your picture. It will download with a watermark if you don’t have premium, but it’s not bad and may be able to be cropped out in another program if it really bothers you. Here’s the prompt…
Turn these beautiful magenta azaleas into a stained glass window.
This is just the beginning of what you can do. You’ll notice you have image sizes to choose from in case you want to make a phone wallpaper size or a Facebook header size. And then you can look toward the bottom for the browse button where you can upload your own image. Or mine if you’ve downloaded it. That’s why I make most of my images Creative Commons. At some point, the page may ask you to create an account in order to download your images. I’m not sure if the gallery to store your images comes with every account, or only on the app, but having lost a number of gallery photos when they crashed last year, I recommend actually saving your favorites to a permanent location.
Now, because I’m a fan of abstract creations, there is a V2 filter I go to often. I’ll share the collage and prompt for that, and I hope to hear from readers that you’ve tried this for yourself and had as much fun with it as I do. The prompt (for use with the image at the top and with their enhanced additions) is…
Turn this into a beautiful stained glass window with the original magenta pink azalea and pink glitter frame colors intact. Intricate lead lines separating vibrant glass pieces, sunlight streaming through to cast colorful reflections, delicate floral motifs surrounding the azalea, subtle gradients blending pinks and purples, the window set against a softly illuminated stone wall, enhanced by shimmering highlights on the glitter frame that catch the light at different angles.
And here are the images…

Share this post on:

A Way (to Play) with Words
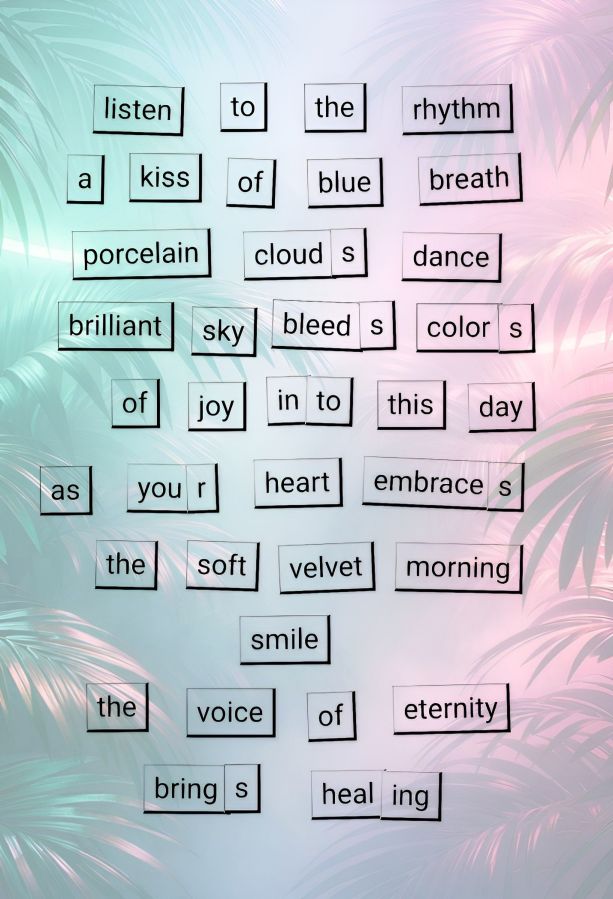
Since I’m in a poetry vein for April, I thought I’d create a decorated word tile poem from Magnetic Poetry® and show you how I do it.
First, go visit the Magnetic Poetry® Online website at https://magneticpoetry.com/pages/play-online
Once there, you’ll click one of the boxes to choose the set of tiles you want to work with. They are just like the ones you can get for home except that you won’t drop one and lose it until you find it under the refrigerator years later. 😂 You can choose from “Original Kit,” “Poet Kit,” “Mustache Poet,” or “Nature Poet” on the front page. Once you select your kit and go to the play page, they’ve also added “Love” and “Geek” to the selections.
On that page, you’ll have a myriad of words to play with. In addition to regular words, you’ll also notice the s, ing, r, es, and other endings you may need to create the right tense of your poetic lines. You’ll notice my “you + r” to make “your” in the above image, and the combining of in and to for “into” in one line. It’s a little bit of work lining them up (in real life kits as well), but it’s part of the creative fun. Also, the pile of word tiles you see is not all that’s available. You’ll see a button to add more words at the bottom, and it will give you a whole different batch from the same kit.
After you’ve played and created some fun lines, you can save and share it if you’re willing to give them your name and email address. If you plan to order any poetry tiles for home, you’ll likely give that to them anyway unless you choose to order from another source like Amazon. If you want to do what I did, just screenshot the whole page. But, before you do that, I recommend you move the piles of unused tiles as far away as possible, so you’ll have plenty of room for cropping your final image.
Once I’ve got my screenshot, I open the image in the Photo Studio Pro app. I can’t tell you how other programs/apps work yet because that’s all I’ve played with so far. In the app, I crop out all the extraneous page info and save just the white background with black-on-white words. It’s not bad just like that, but I like pretty papers and stuff, so my next step is to use the app’s blend menu to create a background. They have a lot of gorgeous designs to choose from, or you can choose your own images or browse an online page from Pixabay public domain images. You can even have their AI design a background for you. And then, you’ll just use the slider to make the image as dark or light as you want with your words.
Here is a collage of my screenshot, then cropped, then blended image…
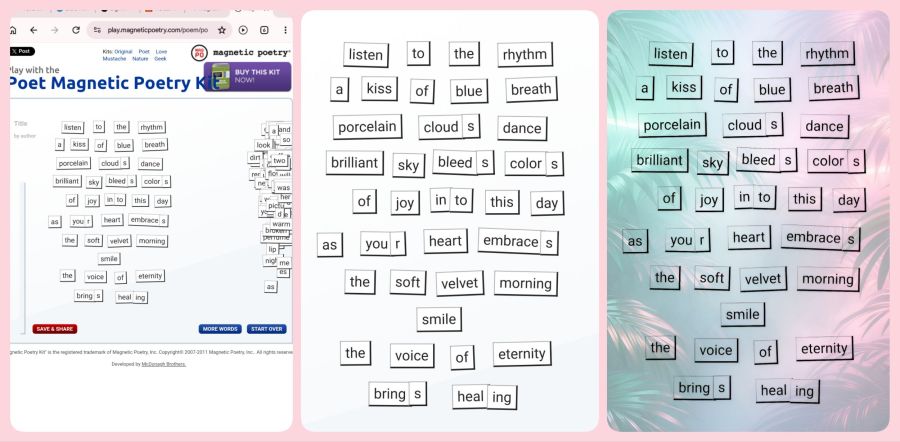
I saved my original cropped image as a “project” in the app, so I can go back and play with different backgrounds if I want. And there you have it; a way to play with words. I’d love to see your creations if this technique works for you. Maybe I can create a group on Flickr (my favorite photo site) just for people doing the online poetry tiles. Now, go play with words.
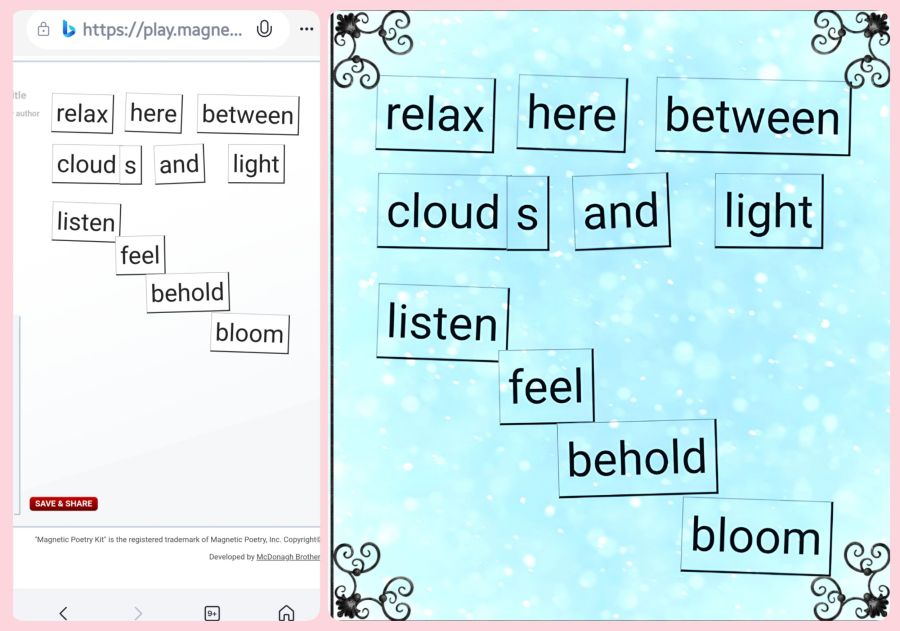
Here’s one more quick set of small ones I made recently…
Share this post on:

A Kaleidoscope Heart

I’m not certain when I looked into my first kaleidoscope, but I know when I first got really hooked on them. There was a big presentation at the Kentucky Center for the Arts back in 1993. Somehow, I got a ticket to it, and I got to take a class and build my first kaleidoscope. Shortly thereafter, I won a contest and used the prize money to buy my first professional kaleidoscope. It was made by Shelley Knapp, and I have an album of pictures from inside that scope on my Flickr page at https://www.flickr.com/gp/crystalwriter/iY6dMcF580 though I have many I’ve not yet added to the album.
After beginning that collection, I somehow ran across this very low-priced piece of software called The Silicon Mirror program. I got the free trial but paid the $12 to purchase it before the trial was over, and have kept it installed on various computers and laptops ever since. They still have it available at https://www.torpor.com/ where you can find a variety of creative and colorful programs. I wish I could play with all of them every day.
Anyway, I was on Yahoo Photos back then and had started my first blog on Yahoo 360. I was also writing my first NaNoWriMo (National Novel Writer’s Month) novel, so I would update the blog with my word count and a picture made in Silicon Mirror each day. I was able to save that blog here at WordPress under “Crystal Writes in 360” but I haven’t gone back to check for writing and grammar imperfections there. It was mostly family reading it back then, so I’m not sure how many mistakes there are. But if you venture over there, you will see the beginnings of my digital kaleidoscope addiction, and many of them were made from pictures of pencils and pens to line up with writing for NaNo.
Yahoo Photos got purchased by Flickr around 2006, I think, so I started putting photos there almost from the beginning. I have tens of thousands of them in my unpublished photos there because I never want to share until I can correctly label everything. This perfectionism drive is one of my big battles that keeps me from getting things done (or makes me take way too long as is often the case with this blog). But you can look at my big collection of kaleidoscope images (some real, many digital, 1069 images & 5 videos all together) in the Flickr album at https://www.flickr.com/gp/crystalwriter/pWx7X5586x
I have so much more I could say about kaleidoscopes, but I’ll close here for now with a collection I made in my Mirror Lab app using the image above. That image, by the way, was originally an inside scope picture that I edited in Photo Studio Pro to get it into a heart shape and then uploaded that to Wombo Dream AI and asked it to create a heart-shaped image. Here is the prompt I used in case you want to use it in your favorite AI image generator:
3D Heart-shaped kaleidoscope mandala with a 3d gilded edge and filled with colorful glittery prisms, on a black background with some super tiny golden sparkle in the black, HDR, pro photo, brilliantly lit, glowing, amazing atmosphere
And here’s the collection…
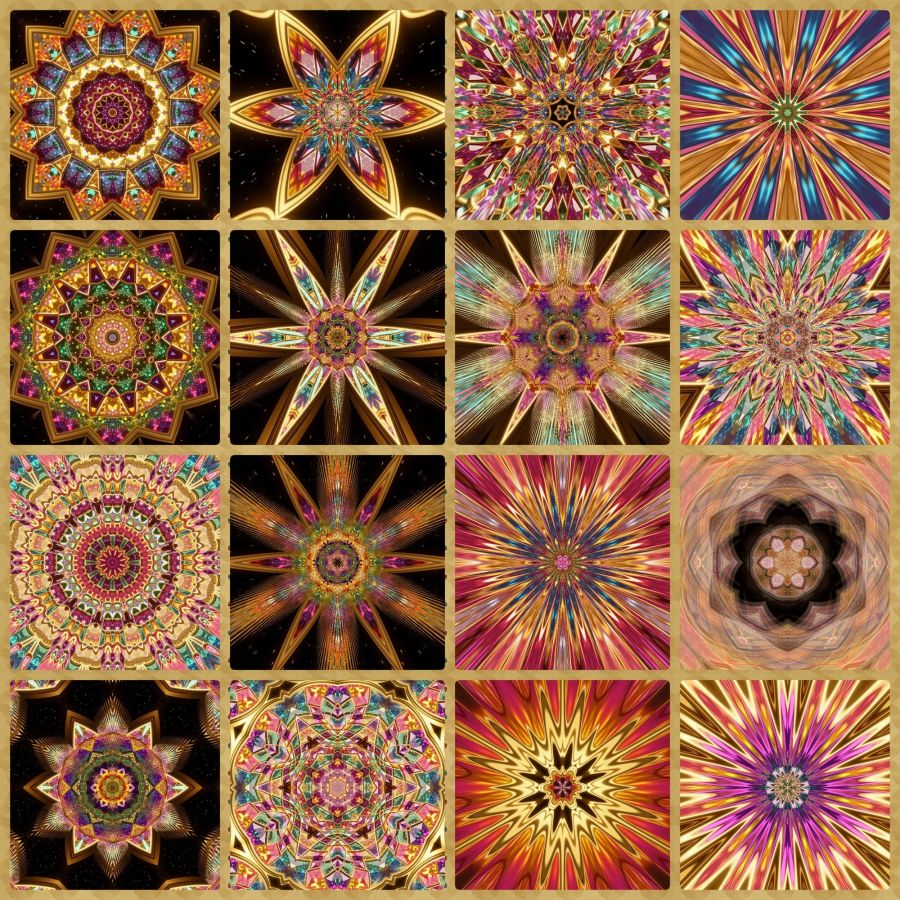
Many people tell me that they haven’t looked in a kaleidoscope since childhood. I highly recommend them for adults as tools to help with anxiety and stress because they create endorphins. I will do another post in the future with links to find kaleidoscopes online along with books and software because I really think they share what the name means, “beautiful image.” And I also believe they represent people the way God looks at His creation: all have beauty that is made more beautiful when light–especially God’s Light–shines through it. Let God light up your most beautiful aspects today and in the future, so you can be a kaleidoscope.
Share this post on:

The Chaos of Learning New Things (and how Gemini AI can help)…

I love learning! I’ve often compared myself to Johnny 5 from the movie Short Circuit because of my desire for more and more input. But the older I get, the harder it is to process that input as smoothly as before. Plus, with technology, I think confusion and chaos come standard.
One of the biggest problems, though, is the lack of help sources. It used to be that search engines could direct you to just the right place for the answers you needed, albeit sometimes they were several pages deep. Still, if you had a math question, you could find an answer from a mathematician. If you needed a recipe, you could find a cooking site. But now, the answers you get are based on sponsorships and marketing.
Tonight, I needed to install an app for my digital thermostat, and the info on the booklet didn’t match the updated app in the Google Play Store. In addition, the review score there was 2.5 with lots of complaints about how the new app wasn’t as good as the old one. What’s a girl to do with all that confusing information?
Well, my newest phone offered me a free one year trial of Gemini Pro by Google. I’ve had a few AI conversations with Copilot and a Bible AI search, but when I noticed how easy it was to feel like I was talking to a human, I decided to limit conversations to needs that couldn’t be met by searching. Well, except for image generation. I love being able to create things I can imagine but could never draw. But that’s a share for another day.
So I went to Gemini and asked how to tackle my current dilemma. To my amazement, it knew about the negative reviews, the switch of apps, and even solutions that made all the difference — enough of a difference for me to install and use the app plus give it a 5-star rating. For example, once I told it the make of my thermostat, it knew the kind of servers and firmware in my device and recommended a 2.4g Wi-Fi signal to not overwhelm it. It knew that Wi-Fi guest networks were usually slower and confirmed I should put my phone on the same guest network until the install was set up. I admit, it was a little scary that it could turn off my cellphone provider’s data temporarily to make sure the devices stayed on a matched service, but it saved me a step. And almost everything it told me to do worked perfectly, so I had none of the issues the complaining reviews mentioned. I felt so victorious when I accomplished that task.
Finally, when everything was done, it asked if I wanted help drafting a review for those new to the app who were only seeing negative reviews and complaints. It gave me a long, detailed review, but I had to tell it to keep it under 500 characters for Google Play Store reviews. I was a bit surprised it didn’t know that. Anyway, I tweaked it a bit, but it made me feel so good to be able to post a high rating since anyone using the app with a new Carrier system needs to know they can trust it to work as it’s supposed to work. It’s hard to trust, and learn something new, when you’re awash in negative reviews and mismatched paperwork. I’ll post the review for the “SmartHome by Carrier Corporation” app in case some of the steps I took might work for other modern tech devices as well. Maybe this will have the answer for someone out there.
With Gemini’s help, I made this work. It works great on the 2026 firmware update and the app 2026 update if you follow these steps for manual setup.
1. Connect wall unit to 2.4GHz/Guest WiFi & put device with app on the same 2.4 signal. IMPT: Do the firmware update first & let it finish (Carrier logo on screen).
2. Skip the QR scan—it fails.
3. In the app, choose “Infinity System” (NOT Smart Thermostat).
4. Use “Manual Entry” for Serial/MAC/PIN from the wall unit’s Wireless > MyInfinity menu.
It’s hard to put that many details in 500 characters, but my personality of always wanting to be helpful hopes it will enable some who failed in the task to now accomplish it. And if my readers cannot use all the info, at least maybe you’ve learned that your Wi-Fi guest network is not likely 5GHz and that 2 devices wishing to communicate should not only be on the same Wi-Fi network, but also at the same speed.
Share this post on:

My Latest Flickr Photos


Others’ Posts I’ve Liked


