Recipe for Rice Cake Pizza Squares 🍕 ⬜
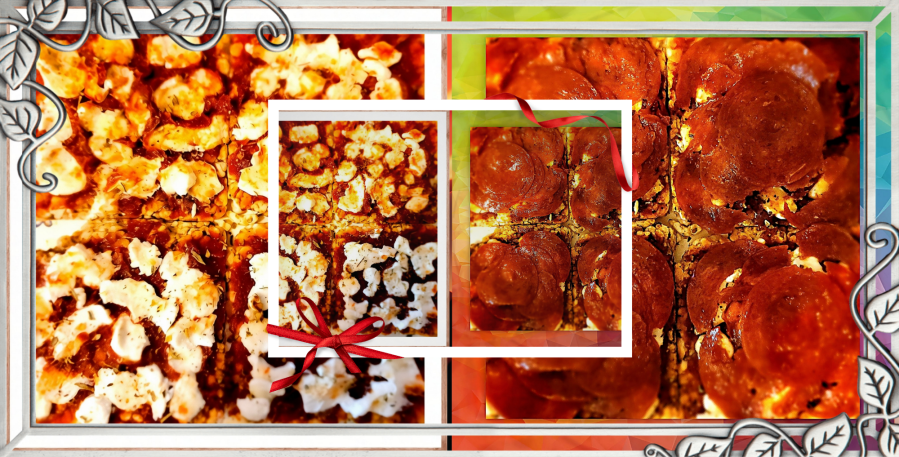
So, I truly understand why food photography is an art that deserves a good paycheck. I took these two photos years ago just to remember what I do to be able to enjoy pizza sometimes.
Ingredients:
- Large thin rice cakes that fit in a toaster
- Butter
- Pizza sauce or Italian tomato sauce thickened with Italian tomato paste
- Pepperoni, Sausage, or Canadian Bacon (optional)
- Crumbled goat cheese or your favorite pizza cheese (or both 🧀😉)
- Italian seasoning mix of herbs like oregano, basil, garlic, etc.
Instructions:
- Toast your rice cakes to make them keep their crunch after toppings are added.
- Spread a thin layer of butter.
- Spread a layer of your chosen tomato sauce/pizza sauce
- Add some of the goat cheese
- Add pepperoni or other meat if you choose
- Add a little more goat cheese
- Sprinkle on some toppings or flavorings
- Bake your creations in the microwave or oven. Because the rice cakes are thin and toasted, the microwave is an option, but a few minutes in an oven or toaster oven (using a baking sheet) will give the best crunch and texture. (I don’t recall the correct temperature.)
Summary
For me, I had been forced to give up pizza because both the dough and the cheese had a negative effect on my bladder. When they told me I had high yeast in my bladder and put me on high doses of Fluconozole, I started doing the research and which foods created yeast. Rice cakes became my replacement for bread and pizza crust, and goat cheese or feta cheese for any foods that needed a cheesy topping or flavor. The vegan cheeses made from cashews are okay, but a lot of replacement cheese has a rubbery feel.
Enjoy your creations with whatever spin you want to add for your own taste preferences. And feel free to tell me what you did to make them perfect for you. 😋
Share this post on:

Recipe for Caesar Salad with Goat Cheese
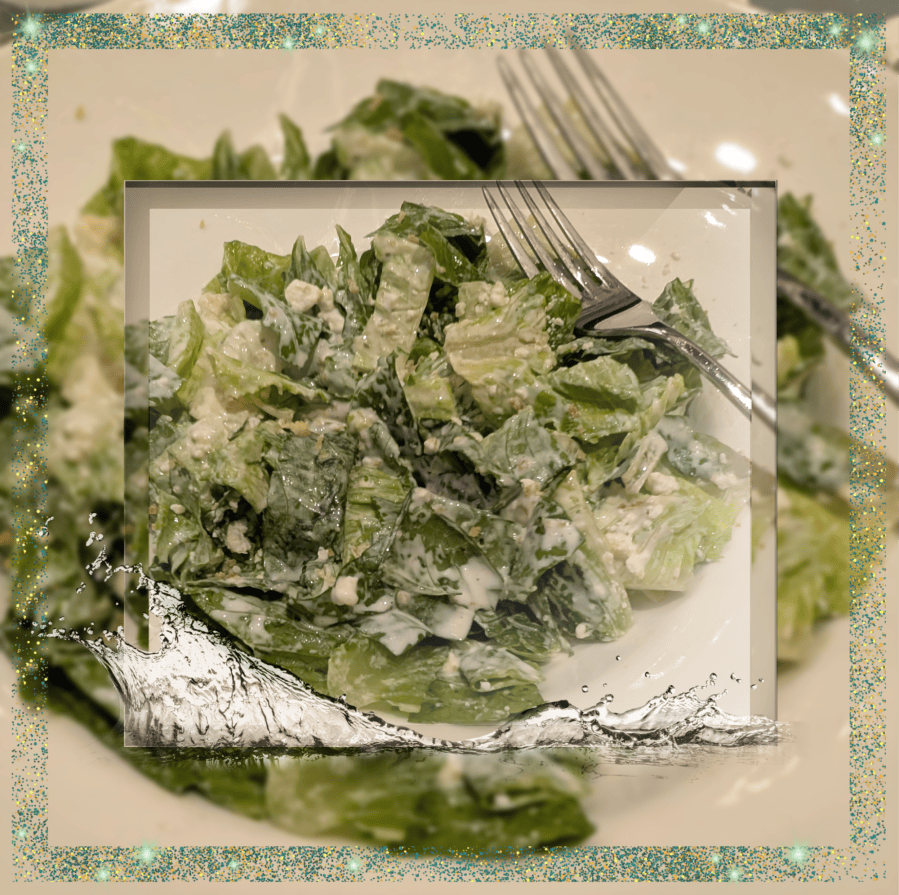
by Crystal A Murray (CC BY-NC-SA 4.0) design by Photo Studio Pro app
“Sometimes the best recipes for life—and the kitchen—come from trying one small, unexpected swap.”
When you are away from your own kitchen, a restaurant meal can still spark great ideas to bring back home. For today’s recipe, I’m sharing a simple flavor twist I tried at dinner tonight: swapping out traditional shredded Parmesan on a Caesar salad for creamy, crumbled goat cheese.
If you love Caesar salad, you already know the classic combination.
Ingredients:
- Crisp romaine lettuce
- Crunchy croutons
- Caesar dressing.
- And normally, salty Parmesan shredded cheese.
- Tonight, the Parm was swapped for soft goat cheese that added a rich, velvety tang that blended perfectly into the dressing and made every bite feel extra special.
Other Twists at Home (or out if available)
- Add bacon 🥓😋
- Add a drizzle of ranch dressing (tonight I stole some of hubby’s)
- Crushed croutons give you a little crunch and great flavor in every bite.
- Grilled chicken
And that’s it for tonight, but I’d sure like to hear from some readers about their own twists on this yummy classic.
Share this post on:

Recipe for Avocado Toast with Toppings 🥑🌾
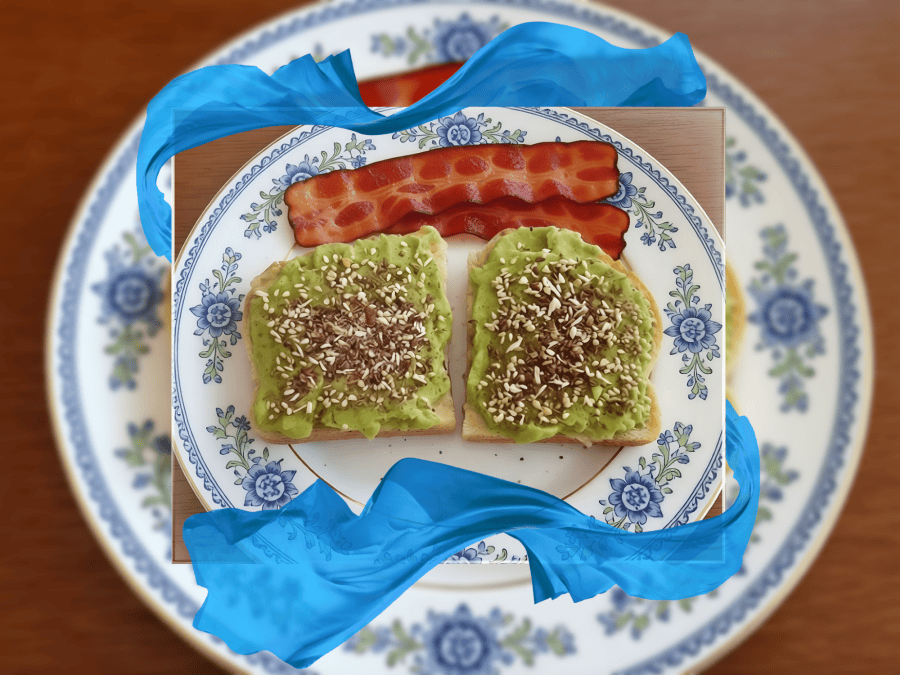
(CC BY-NC-SA 4.0) With Photo Studio Pro app for Android
Yes, the toast is real, and it’s my favorite way to eat either sourdough bread or avocado. And sprinkling toppings like flax and chia make it just that much better. I did use the AI editor in Photo Studio Pro to replace the paper towel under the original toast picture and add a couple slices of bacon to the plate. It sure picked a pretty plate to put underneath.
I have a variety of toppings I use, so I’ll list them all with links to Walmart and Amazon (the latter being affiliate links) to make it easier for you to create your own gourmet toast creations. I think I took this picture before I started adding dry oatmeal to the mix, but that makes a great topping for both flavor and fiber.
Ingredient Ideas:
- Artisan Sourdough Bread (Marketside at Walmart is my usual.)
- Wholly Avocado spread (or Wholly Guacamole if you want spice)
- Butter (yes, I put some butter on before adding the avocado spread).
- Organic oatmeal (I like Nature’s Path Superspeeds and Grains)
- Barlean Flax, Chia, Coconut Seed Blend (see note at the bottom for their sweeter digestive mix info).
- Everything But the Avocado Toast Topping by Gustus Vitae (and this one is better with unflavored oatmeal and plain Barlean).
Instructions:
- The artisan loaves of sourdough seem to have more of the sourdough yeast in them, but they don’t fit in my toaster. So, step 1 is to choose one of the larger slices and then cut the bread in half.
- Toast the bread to your preferred doneness.
- Spread a thin (or thick if you prefer) coating of butter or margarine for moisture and flavor.
- Spread the avocado over the butter. To me, the amount in one serving cup of Wholly Avocado is exactly right for splitting between two half slices of bread. When I used two whole slices and just trimmed off what didn’t fit in the toaster, the ratio of avocado to toast didn’t seem as perfect to me.
- If you use the Gustus Vitae seasoning, it includes some salt, but if not, you may want to sprinkle a little sea salt on the topped toast before adding the looser toppings.
- Add the regular Barlean seed mix if you’re using the unflavored oatmeal and/or the Everything seasoning. And this goes great with a savory dish like eggs—and bacon.
- Enjoy this as its own meal or as an addition to a yummy breakfast.
- NOTE: If you leave off the avocado and other seasonings, Barlean has a delicious seed mix with cinnamon added that gives just a hint of sweetness to buttered toast. (Barlean Flax, Chia, Coconut, Pumpkin, and Quinoa Seed Blend.) It goes well with either plain or some sweet-flavored oatmeal like the “100 Calorie Pack Maple and Brown Sugar” mix by Better Oats. (Or the Apple and Cinnamon or the Cinnamon Roll.) And it’s even fewer calories since you’re not putting an entire package of the oats. This toast combo goes so well with a fresh banana that it’s my other go-to breakfast.
So there you have it; breakfast or late night snack, it’s a winner. And then there are the benefits of the natural yeast in sourdough. For me, sourdough bread has helped support better digestive health, and I noticed huge improvements after years of dealing with excessive candida from post-surgery antibiotics.
Share this post on:

Recipe for Peanut Butter Burritos 🥜🌯
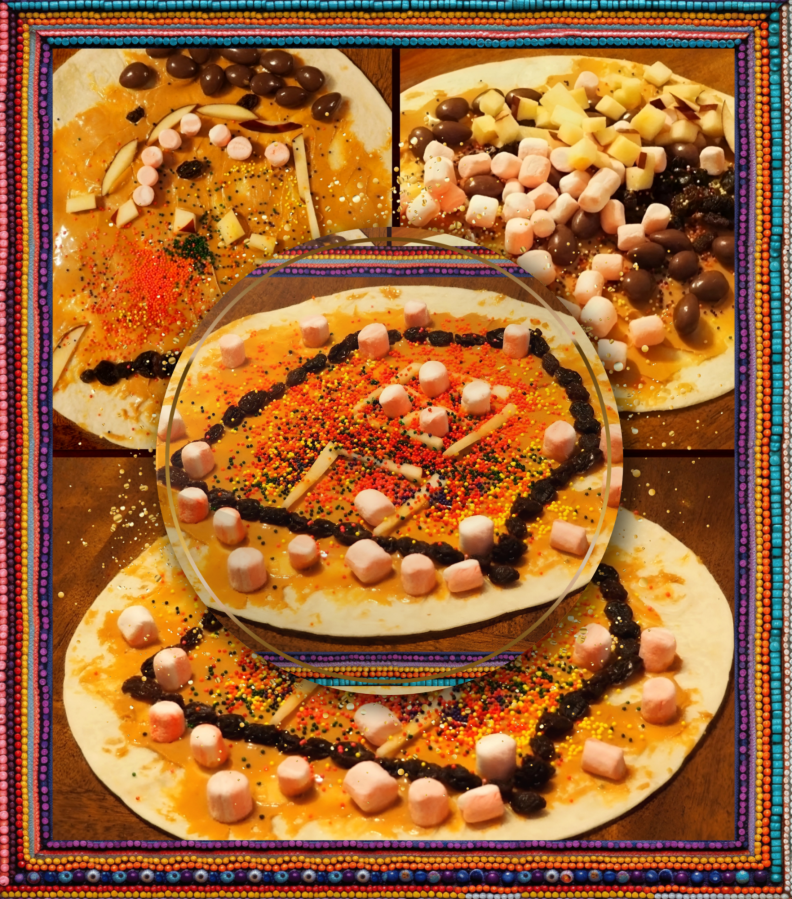
(CC BY-NC-SA 4.0) Designed in Photo Studio Pro app for Android
I know, they look messy. But if you’re going to have some kiddos around for the holiday season, I highly recommend this fun recipe-and-activity meal idea for your table. The kids have fun while they make the food, and then they get to eat their creations. 😋
Recipe Ingredients…
- Large flour tortillas
- Creamy peanut butter
- Toppings:
Any variety of toppings you can think of that are small enough to stick to the peanut butter and stay in place when you roll up the tortillas. Some ideas include mini marshmallows, candy coated chocolates, chopped up cookies, chopped peanuts, chopped cranberries, chopped dates, diced apples, shredded coconut, raisins, other dried fruit pieces, and, of course—lots of sprinkles! 🍩✨
Recipe Instructions:
- Spread the creamy peanut butter to cover most of the tortilla.
- Give the “designers” a selection of toppings in bowls and let them get as creative as they like.
- Consider themes if you like, so tell them to make Christmas trees or give them red and green toppings and sprinkles.
- Don’t let them put so many toppings that they can’t stick to the peanut butter coating.
- Syrup or honey is not recommended unless you’re going to cut the finished product in bite-sized pieces.
- Roll up the decorated tortilla with a secure fold at the bottom to hold all the goodies inside.
- Enjoy watching them eat, or join in the eating, of these yummy art projects.
- Note: Take a lot more pictures than I did. 📸
It’s in the afterthoughts that you realize things like, Why didn’t I take more pictures? But the biggest after-the-fact realization I got from this was when one of our nephews decided he wanted honey on his. He was older and making it for himself as a meal, not part of a group project, so he got the honey out of the cupboard and added far more than he realized. When he got it rolled up, he started eating it as he walked across the kitchen dripping a long trail of honey behind him. When I asked if he was going to clean it up, he answered, “Why? The burrito did it!”
The Burrito Did It!
So I’m going away from the recipe stuff now to share this statement because it has become a frequently-used statement in our lives. When our nephew said it, I think he truly meant it because it took a lot of explaining for him to understand his own part in helping the burrito, and therefore making himself responsible to clean up. But we hear people pass the blame on so many things these days, and that’s when hubby and I turn to each other and say, (I’m sure you know what), The burrito did it.
A lack of personal responsibility led to sticky honey all over the floor. That same lack would’ve let it stay without authority that demanded the party who did it clean up after himself instead of creating a “cleanup on aisle 2” scenario where someone else is called in to take care of the mess.
See, he still got to enjoy his peanut butter and honey burrito. He just had to take the time to do his part. And the next time he made that treat, I’d imagine he was more careful. If not, maybe he got a house full of ants.
It works the same for all of us. Blaming someone or something else for our own behaviors not only leaves others to do what we should do ourselves, but can lead to extended problems with “ants” in our future. If you ever forget that, just imagine the scenario I’ve shared and say, “The burrito did it,” and you’ll realize the silliness of passing blame. 🤪🤡
Just FYI, Proverbs 19:3 actually addresses this well.
“[3] A man’s own folly subverts his way, yet his heart rages against the Lord.”
And if you make any fun creations, please come back and tell me about them in the comments. Or… Tell me your own “burrito did it” stories. 🤭
Share this post on:

Recipes for Flavored Butter 😋🧈🧈🧈 😋

with Design Help and Creation by Microsoft CoPilot AI
I’ve had a great day meeting new, wonderful people (my brother’s birth mom, sister, and niece) and a bit of a drive to get there. So, I started out thinking I’d just post the flyer of flavored butters, but then decided I must share the whole recipes. I hope you enjoy them and make them for gifts this Christmas. If you’re near me, you can even bring me some of your successes for my sourdough toast. Lol 😂 Anyway, I hope readers will not only try the recipes, but tell me what worked for you and any suggestions or modifications you might have. I’m planning a similar set of recipes for spring/summer, so be sure to bookmark this post because I will crosslink the two of them.
First, I’m sharing a flyer with eight recipes for holiday butter spreads and their basic ingredients. Below that, I will share the detailed recipes. Here’s the beautiful page I designed in Microsoft CoPilot for this project:

Detailed Butter Recipes
🍎🥧 Apple Pie Butter
Ingredients:
- 1 cup softened butter
- 2 tbsp apple butter
- 1 tsp cinnamon
- ½ tsp nutmeg
- ¼ tsp allspice
- 1 tsp vanilla
- Pinch of salt
Instructions:
- Beat butter until smooth.
- Add apple butter and mix until fully blended.
- Add cinnamon, nutmeg, allspice, vanilla, and salt.
- Whip until fluffy.
- Store in an airtight container.
📝 Note:
The flavor of this butter becomes richer after a short chill in the refrigerator. Serve it on toast, biscuits, muffins, pancakes, waffles, or warm quick breads for a classic apple-pie-inspired treat.
🍂🍁 Warm and Cozy Butter
Ingredients:
- 1 cup softened butter
- 3 tbsp maple syrup
- ½ tsp cinnamon
- ¼ tsp nutmeg
- ½ tsp vanilla extract
- Pinch of salt
Instructions:
- Beat butter until smooth.
- Add maple syrup and mix until fully blended.
- Add cinnamon, nutmeg, vanilla, and salt.
- Whip until fluffy.
- Let rest for 15–30 minutes to allow the flavors to bloom.
- Store in an airtight container.
📝 Note:
This comforting butter combines maple sweetness with warm baking spices, making it a perfect companion for breakfast breads and holiday baked goods. Allowing the butter to bloom before serving helps the spices blend into a smooth, balanced taste.
🧡🥧 Pumpkin Pie Butter
Ingredients:
- 1 cup softened butter
- 2 tbsp pumpkin puree
- 1 tsp pumpkin pie spice
- 1/2 tsp vanilla extract
- 1 tbsp powdered sugar (optional, for a sweeter spread)
- Pinch of salt
Instructions:
- Beat butter until smooth.
- Add pumpkin puree and mix until fully incorporated.
- Add pumpkin pie spice, vanilla, powdered sugar (if using), and salt.
- Whip until light and fluffy.
- Let rest for 15-30 minutes for the spices to bloom.
- Store in an airtight container.
🎁 Gift-Giving Note:
Pumpkin puree gives this butter its cozy fall flavor but also makes it softer than traditional flavored butters. If sharing it as a gift, keep it well chilled, package it in a small jar with a lid, and remind recipients to refrigerate it and enjoy it within a week for the best quality.
🍊🍯 Orange Honey Butter
Ingredients:
- 1 cup softened butter
- 3 tbsp honey
- 1 tsp orange zest
- ½ tsp orange extract
- Pinch of salt
Instructions:
- Beat butter until smooth.
- Add honey and mix until fully blended.
- Add orange zest, orange extract, and salt.
- Whip until light and fluffy.
- Let rest 15–30 minutes to allow the orange flavor to bloom.
- Store in an airtight container.
📝 Note:
Fresh orange zest provides the brightest flavor, while orange extract reinforces the citrus aroma without adding extra liquid. Avoid using orange juice, which can make the butter too soft and shorten its shelf life.
🔴🍁 Cranberry Maple Butter
Ingredients:
- 1 cup softened butter
- 2 tbsp pure maple syrup
- 2 tbsp crushed freeze-dried cranberries
- ½ tsp vanilla extract
- Pinch of salt
Instructions:
- Beat butter until smooth.
- Add maple syrup and mix until fully blended.
- Stir in the crushed freeze-dried cranberries, vanilla, and salt.
- Whip until light and fluffy.
- Let rest for 15–30 minutes to allow the flavors to bloom.
- Store in an airtight container.
📝 Note:
For the best texture, crush the freeze-dried cranberries into very small pieces before mixing them into the butter. The maple flavor will become more pronounced after chilling.
🤎🧈 Brown Sugar Cinnamon Butter
Ingredients:
- 1 cup softened butter
- 3 tbsp coconut sugar
- 1 tsp cinnamon
- ½ tsp vanilla
- Pinch of salt
Instructions:
- Beat butter until smooth.
- Add coconut sugar and mix until fully blended.
- Add cinnamon, vanilla, and salt.
- Whip until fluffy.
- Store in an airtight container.
📝 Note:
Coconut sugar gives this butter its rich, caramel-like sweetness and warm brown color. If you have a coconut allergy or prefer not to use coconut sugar, light brown sugar may be substituted. Chilling the butter for a short time before serving allows the sweetness and cinnamon to meld together beautifully.
🍫🌰 Chocolate Hazelnut Butter
Ingredients:
- 1 cup softened butter
- 2 tbsp chocolate hazelnut spread
- 1 tbsp finely chopped toasted hazelnuts
- 1 tbsp cocoa powder
- ½ tsp vanilla extract
- Pinch of salt
Instructions:
- Beat butter until smooth.
- Add chocolate hazelnut spread and mix until fully blended.
- Add cocoa powder, toasted hazelnuts, vanilla, and salt.
- Whip until light and fluffy.
- Let rest for 15–30 minutes for the flavors to bloom.
- Store in an airtight container.
📝 Note:
This butter is especially delicious on toast, croissants, pancakes, waffles, or warm dinner rolls. The toasted hazelnuts give this butter a deep and distinct nutty flavor profile.
🍁🥜 Maple Pecan Butter
Ingredients:
- 1 cup softened butter
- 2 tbsp pure maple syrup
- ¼ cup finely chopped toasted pecans
- ½ tsp vanilla extract
- Pinch of salt
Instructions:
- Beat butter until smooth.
- Add maple syrup and mix until fully blended.
- Stir in pecans, vanilla, and salt.
- Whip until light and fluffy.
- Let rest for 15–30 minutes to allow the flavors to bloom.
- Store in an airtight container.
📝 Note
Toasting the pecans before adding them deepens their flavor and adds a warm, nutty aroma. Allow the pecans to cool completely before mixing them into the butter.
🎁💡HOLIDAY GIFT-GIVING TIP
These flavored butters make thoughtful homemade gifts throughout the holiday season. Spoon the finished butter into small jars with secure lids, add a decorative label or ribbon, and keep refrigerated until ready to share. For an extra-special touch, pair a jar with fresh bread, muffins, biscuits, scones, or a favorite family recipe. Be sure to remind recipients to keep the butter refrigerated and enjoy it within one week for the best flavor, texture, and freshness.
Share this post on:

Recipe for Potato/Rice Stew 🥔🍚🥘
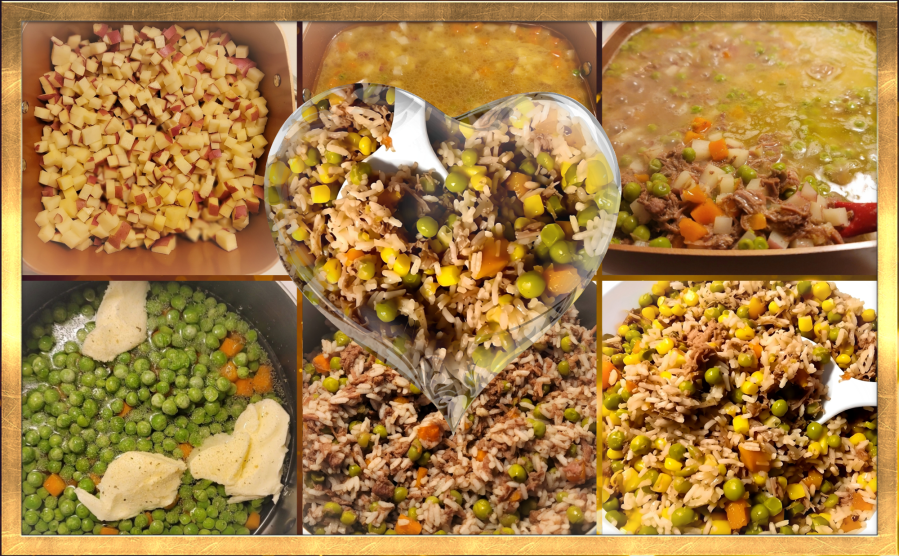
(CC BY-NC-SA 4.0) with help from Photo Studio Pro app for Android
Did anyone think I was suggesting to include both potatoes and rice in the beef dish? I wanted to write it that way to save length in the title—and to have a little fun. But, as you can see from the image, we’ve got two similar but different recipes. And they are both yummy.
Beef Stew with Potatoes
You can see that I like to chop my potatoes very small. They cook faster and soften up nicely. When making the stew with them, that was always my first step. I would add the butter and seasonings and boxed broth mix (beef broth for beef or chicken broth for chicken) and boil the potatoes for about 10 minutes. Then I add my frozen veggies; usually one bag of frozen peas and carrots mixed and one bag just frozen peas. We noticed they’d been putting way more carrots in the mixed bag, so adding the peas alone gave us a better ratio. After another 15-20 minutes on a low boil, I’d add the meat. Here’s what I prefer to use:
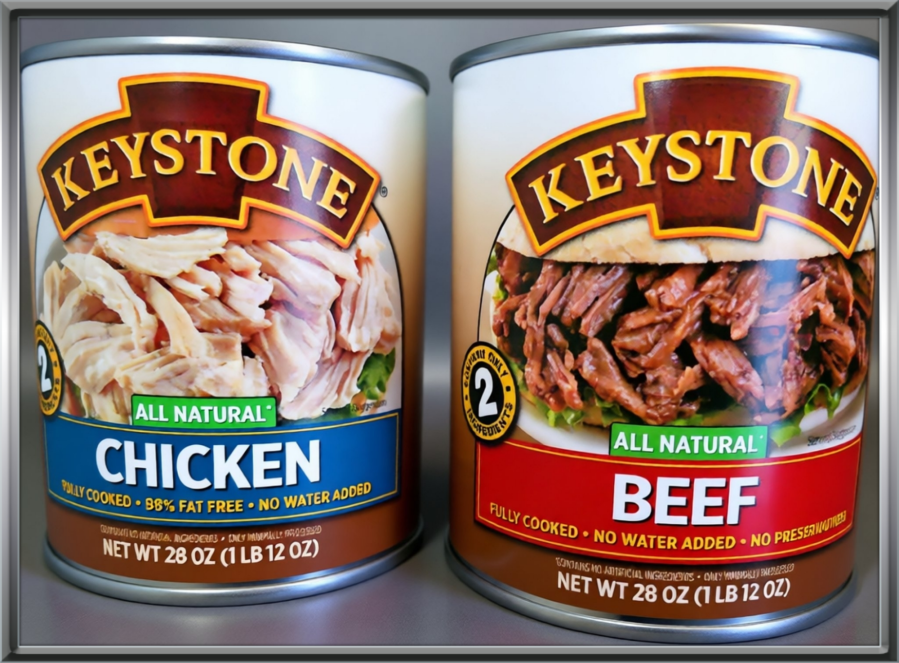
The flavors of these are great, and because I’m making a large one-pot meal, I use the whole can. We usually have at least two days of leftovers.
Beef or Chicken and Rice
You’ll notice I was speaking in past-tense about the potato stew, and that’s because of the potassium in potatoes that prevents hubby from eating them anymore. So now we make almost the same thing but with rice and with less broth because of his fluid restrictions. At least we have found tasty ways around both the dietary restrictions and dietary preferences for both of us. The biggest difference in the rice dishes is using instant rice and adding it last. And just before the rice, I often add frozen corn. We like that to be less cooked than the peas or carrots.
Basic Ingredients for Both
- 1 can (28 oz for a large portion) shredded beef or chicken
- I bag frozen peas and carrots
- 1 bag frozen peas
- ⅓ bag frozen whole kernel corn
- 16-20 oz beef or chicken broth
- 2-3 half sticks of butter (or margarine if you prefer)
- 4-6 medium potatoes (diced) or 2 cups instant rice
- Seasonings to include: onion powder, smoked paprika, a sprinkle of parsley flakes, maybe a little garlic with rosemary in it. I rarely use a measuring tool, so most of this is just to taste. And salt if you want it. By the way, my favorite onion powder is at Amazon by Gustus Vitae brand. I’ll add links at the bottom for that (most spices in that brand come in convenient cans with magnets that let them stick right to the fridge—which is great for the Avocado Toast sprinkle), and the Colima salt I mentioned in yesterday’s cabbage soup post, and the rice.
I gave the basic instructions above, so now I’ll just add that my favorite rice to use is Minute ™ Rice, and while it calls for 5 minutes after you add it to a boiling hot base, I prefer to let it sit covered for 20 minutes. It makes it more tender and absorbs more liquid.
Here are the (affiliate for tracking) short links to items to Amazon…
- Gustus Vitae French Onion Powder: https://link.amazon/B07BvSDCy
- BONUS: Gustus Vitae Everything But the Avocado Toast seasoning: https://link.amazon/B0eNg0bsI
- Colima Sea Salt: https://link.amazon/B05F6RB94
- Colima Sea Salt FLAVORED: https://link.amazon/B0iBKvQ7T
- Minute Rice 72oz Box: https://link.amazon/B01Rwiobl
- Keystone Meats Page (all varieties) at Walmart (not affiliate): https://www.walmart.com/brand/keystonemeats/10071862
I hope these posts help you readers to create tasty meals for yourselves and your families. Feel free to share your successes when you have them, or tell me what you think about new products you had never tried before. I’m sharing them more for the joy than the affiliate click since I’ve literally never made even 1 cent from the program, but I am happy when I see that people have clicked and learned from my referrals.
Share this post on:

Recipe for Cabbage Soup 🥬🍲
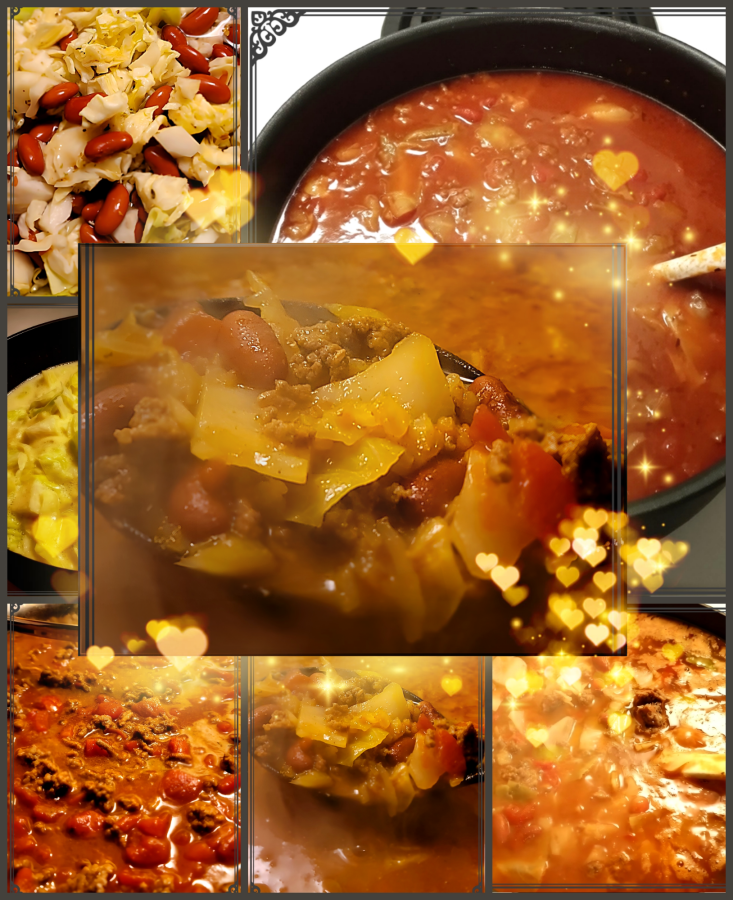
(CC BY-NC-SA 4.0) with help from Photo Studio Pro app for Android
It all started with a diet. Many years ago while in my twenties, I read about the “miracle soup” diet. Back then, I followed it almost to the letter, but I can’t recall if it made a difference or not.
Fast forward to a married woman wanting to make something healthier for herself and her husband. But… He hates onions. Okay, onion soup mix it is, then. And… He doesn’t really like cabbage. Well, some extra tomato products might help, but ground beef is the real winning addition. And some butter and bacon grease also add some nice umame. Of course, it no longer resembles the heart-healthy soup from the original recipe. 🙃
Ingredients (Adjustable to Amount Desired)
- 1 head of fresh cabbage (sized to fit your soup pan)
- 1-2 pounds lean ground beef (lean has better texture)
- 1 yellow onion or 1 package powdered onion soup mix
- 2 cans Italian-flavored diced tomatoes
- 1 can Italian-flavored tomato paste
- (optional) 1 can light red kidney beans
- (optional) Butter (I use a full stick for a large cabbage)
- (optional) 1-2 tbsp bacon grease
- Seasonings to taste can include onion powder, garlic powder, smoked paprika, other favorite smoke flavorings.
Instructions:
- Start by washing and chopping your cabbage into about 1-inch cubes. I slice one large piece then chop it both directions to get the size I want. The close-up spoonful above probably gives you the best idea of the final piece size.
- Transfer your chopped cabbage into your selected pan. It should come up between half and two-thirds depending on how large you went with the cabbage and how big of a pot you choose. Add your onion/soup mix, butter, bacon grease, beans, and seasonings, then add water to mix all of it together. I generally put the water almost level with the cabbage.
- Bring it all to a boil and then cover and simmer, stirring occasionally, for 30-40 minutes. That part depends on if you used beans and on how tender you want them, but the cabbage should be tender within half an hour.
- While that is simmering, brown your ground beef. Tip: I’ve noticed that, even with lean beef, if I add a little water to the raw meat, it drains better at the end or it cooks completely with no grease if it’s extra lean.
- Once your beef is cooked, add in your cans of diced tomatoes. (I used to use one can diced and one can stewed, but now I can no longer find the Italian stewed tomatoes.) Keep that on a low simmer until it starts to thicken up. Then add the tomato paste to fully thicken it.
- When that’s done, you can just let it sit in the pan as the flavors fully bloom, and you wait for the cabbage mix to be ready.
- Once the cabbage mix is ready, if you’re like me, you have to set one bowl aside with no meat or tomato just because you like cabbage. 😋 But whether you do that or not, now your cabbage is ready to receive the beef and tomato mix. Just dump it right into your soup pot and stir it around over low heat. Simmer to thicken or add a little water to make it more soupy if you like.
Cold Days and Hot Soups
I’m a big fan of soup throughout the year, but especially in the winter until I learn to make the gazpacho recipe that’s been sitting in my phone notes for months. Because of hubby’s liquid restrictions due to dialysis, he can’t really eat soups and stews as much now, so it’s been a while since I made this one. And because I cook to taste and adjust based on what’s available in both fresh and canned items, I give you approximate amounts I recall from before 2023 when the kidney journey began. Use your own taste buds and family needs to determine exact amounts and ratios for your soup. But doing anything even close to this should make it really enjoyable for your cold days. Enjoy!
Share this post on:

🎬 🎵 Recipe for Making Apple and Orange Pomanders 🍎🍊
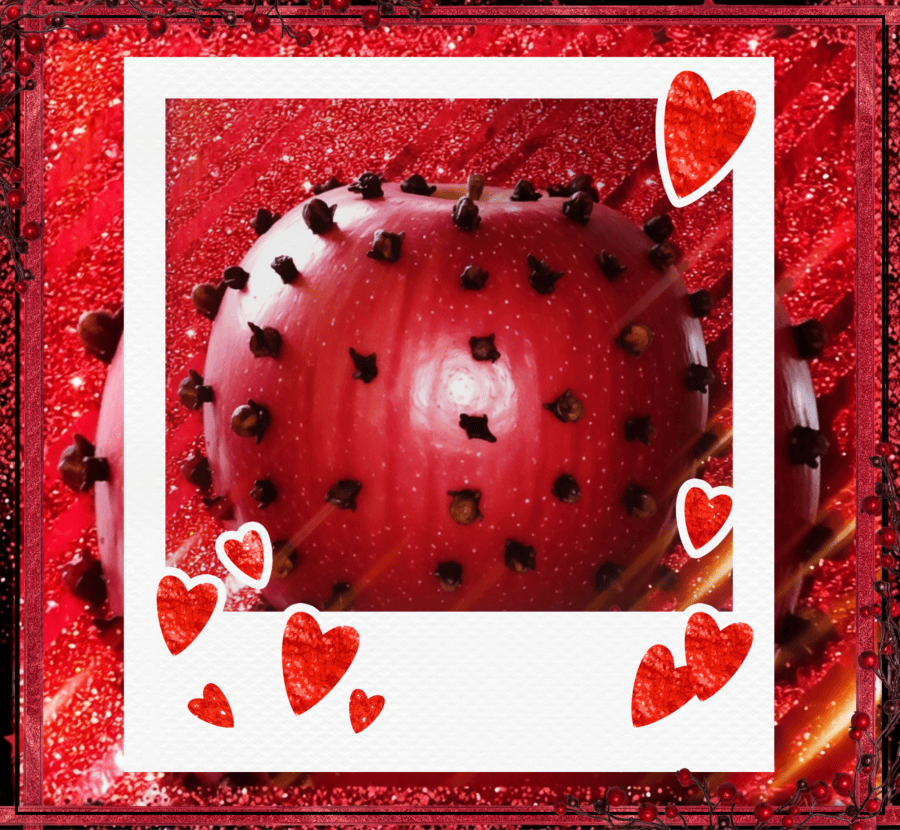
(CC BY-NC-SA 4.0) with help from Photo Studio Pro app for Android
First, what is a pomander? Grokipedia has a detailed article about it with 55 source links at the bottom. I think you’ll be able to turn anything into a wonderful bit of scent after reading all that. 👃
The PIP above is my own cloved apple pomander from a long time ago, and it really did last a number of years. I wish I’d read instructions first to learn that puncturing the fruit with a large toothpick or bamboo skewer helps the cloves go in better. I just imitated what I saw a neighbor make for my grandma when I was young. I knew it was about inserting a lot of cloves into an apple, but I didn’t know how sore your fingers could get from many repetitions of pushing sharp, dried flowers into place.
But the smell was so worth it! With my reactions to scents, especially from chemicals, this is an air-freshener I can actually use. And the smell of cloves reminds me of the cloved hams my grandpa made for holidays. The ONLY reason I haven’t made more was the finger pain, but now I’m ready to try again with the assistance of pre-punctured holes. And maybe I’ll even consider turning it into an ornament like they do in the video I’ll share at the end. I set it on a glittery red gift box for a picture, but a real ornament would probably look even prettier.
To keep it simple, here are the ingredients you may want…
- Apples or Citrus (oranges or lemons)
- Whole Cloves, about 1/4 cup
- 1 Tbsp each of Ground Cinnamon and Ginger (should be enough for about two apples)
- Bamboo Skewer, Large Toothpick, Needle, etc.
- Ribbon and Twine
- Hot Glue Gun (for decorations and ribbons)
Instructions
- Your apple (or orange) should be fresh and blemish free, have a fragrant aroma, and still have its stem to hang it up to dry.
- Puncture the fruit with a skewer in the design you want to make for the cloves.
- Use whole cloves, and fully cover the fruit if you want it to last even longer, but the antioxidant properties in this craft make it resilient already.
- Put the apple in a paper bag with the spice mix and close the top then shake gently to coat the outside of the fruit. (I consider this optional since I didn’t need the extra scent before, but this was in the instructions from Homestead Lady and you might like it better that way. If I do it, I’ll probably try some other spices as well.)
- Once you remove it from the bag, you can simply add some twine or string, or you can get fancy with ribbons and glue and cloth leaves.
Here’s a nice instruction video from My Quaint Cottage on YouTube where they have other crafty videos as well, though the newest one is 4 years ago:
And just because I really like music and singing, here’s a music video about apples:
I found one more with lyrics and clips from the movie Up, but it was only listed 4 months ago, so I’m not sure if it has any copyright risks that could make it be taken down. For now, though, it’s just adorable:
Share this post on:

Recipes for Fried Taters 🥔🍳
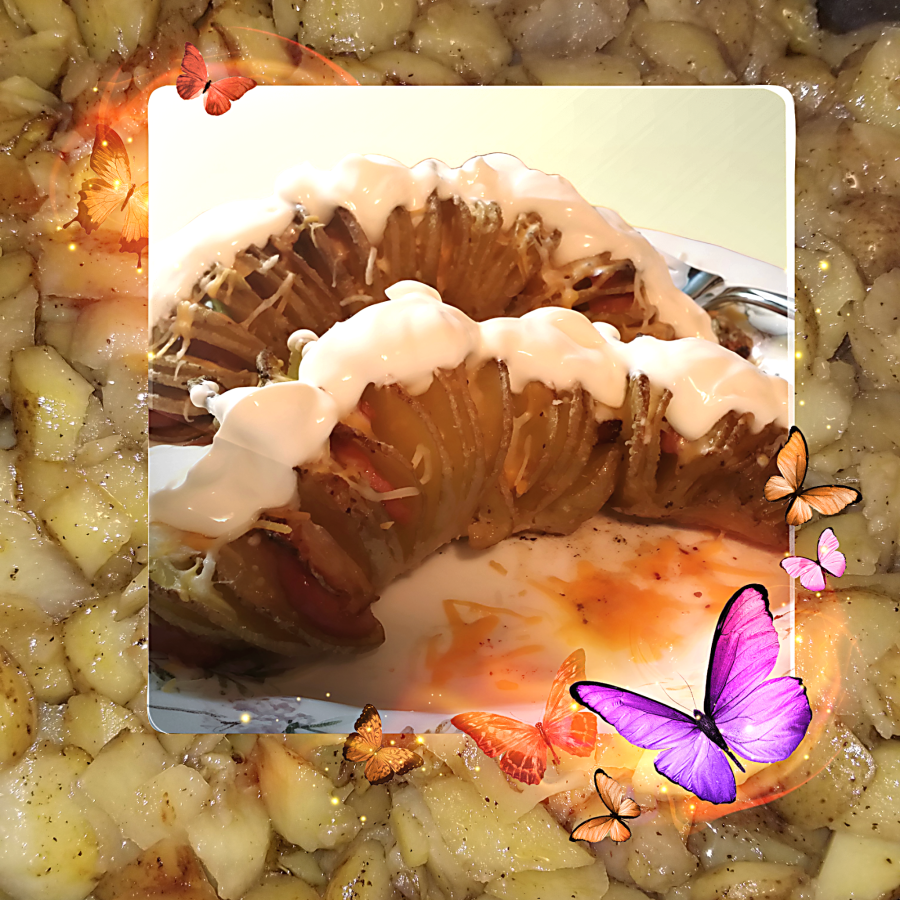
From a Recipe I Found Years Ago
A lot has changed since I made these potato dishes in 2014 and 2019. But that doesn’t mean they weren’t yummy at the time; or that they wouldn’t be yummy now—if me and hubby could eat them. So, I’ll share the recipes with you readers and hope someone makes them, so I can enjoy them vicariously.
Vicarious
In case you don’t know it, the definition for the word vicarious is: Experienced in the imagination through the feelings or actions of another person. You eat and enjoy, and I’m happy because I contributed the idea.
Fancy Baked Potatoes
You’ll notice the image in the middle of the PIP is pretty obviously russet potatoes. Or something in that family that is larger in size and firm enough to cut in thin slices. Believe it or not, that was one of the hardest parts of preparing that meal; getting the slices thin enough to crisp but thick and strong enough to hold the slices of smoked sausage and still stay together at the bottom as one potato rather than scattered across the dish.
For each potato, you’ll scrub it clean and remove any growths or spots from the outside. Then you’ll want a very sharp knife to slice each potato about 50 times, I’d guess. I didn’t count. But I think I was going for around ¼ of an inch for each slice. I misted them with a little water and then sprayed on a thin coating of safflower oil. That’s my favorite because it’s got a high smoke point and a neutral flavor profile.
I’m not a perfect recipe follower, plus it’s been long enough that I’m not certain about the oven temperature, but I’d guess at least 375° for about 30 minutes to start. Then, pull them out and let them cool enough to pull back the layers and add slices of smoked sausage or whatever other additions sound tasty to you. Maybe some grilled chicken tenderloins and/or slices of green pepper 🫑 or onion 🧅. Spritz a little more oil over them to help them crisp when you return them to the oven for 20-30 minutes.
Finishing up
The final steps will be pulling them out to add some cheese then giving them another 5-10 minutes to fully melt it. Add salt, pepper, and sour cream if you like, and serve with some sliced cucumber or a salad. It was yummy, but I’m not sure it was more yummy than making potatoes in a skillet without the extra time of trying to get the uniform slices.
From Grandma’s Kitchen
And that’s the background image. Fried taters ala Thelma (my grandma) that were served at least once a week growing up. Some of my best and fondest memories from youth include my grandmother—and especially her puttering around the kitchen. I think she was already sick with her cancer the first time I made these for her and my grandpa, but they were both impressed at how well I’d learned from her.
For the pan fried potatoes, you can use russets or Yukon gold potatoes (I think the red ones and the super small gold ones both soften too much), and then the first trick is in the slicing. There’s no uniform slicing for these. You simply grab a paring knife and cut toward you in semi-circular slices. There will be mixed thickness based on how the knife grabs the potato meat and whether you leave the skin on. That’s my preference for both flavor and texture.
Once you have a pan full of sliced potatoes, you’ll add your choice of dry seasonings. I prefer a lot of onion powder, a little garlic, and a generous amount of smoked paprika. Sea salt is a must unless you’re salt free. I add about ¼ cup of water before adding the safflower oil because it helps the potatoes steam, and it seems more oil drains off after they’re cooked. But I’m generous with the amount of oil while cooking.
Steam to Soften
Now the next trick, which is a well-fitting lid. If you don’t have one for your chosen skillet, fold some foil to make a nice thick cover from edge to edge. Next, simmer over low heat (I liked flame when I had a gas stove) for about 20-30 minutes to soften the potatoes. Russets take a little longer. Then turn up the heat and cook another 10-15 minutes to create some nice crispy edges. When you’ve got them just the way you want, remove them from the heat and drain them. A thick stack of white, food-safe paper towels can absorb excess oil as well. If you can’t get them to crisp right, you may cook them a bit longer after draining.
Ready to eat?
Now, they are ready to eat right then, either as a main dish or a side. But my favorite way to eat them incorporated the smoked sausages mixed in during the cooking, and fresh onion unless hubby was eating them. They are also great with some eggs scrambled into the mix with or without the meat. And, of course, some cheese on top. I used to add sour cream to mine, and hubby added some mustard. Both are delicious, and sometimes, a little ketchup is perfect.
Closing
So now you know how to make really tasty potatoes. And my quick reasons for mostly giving them up as I used to make them are these: Hubby is on dialysis and cannot have potatoes at all due to the potassium. I even make our stews with rice now. If I make a small batch for me, I no longer add any cheese because it stirs up yeast in my system. So enjoy them as I’ve suggested, or create your own potato-centric dishes and be sure to tell me what worked and what you changed. If you create your own post with some pictures, please put a link in the comments, so I can get my vicarious tater fix. 😋
Share this post on:

😋 Recipe for a Fresh Bowl of Color 🥒🍅
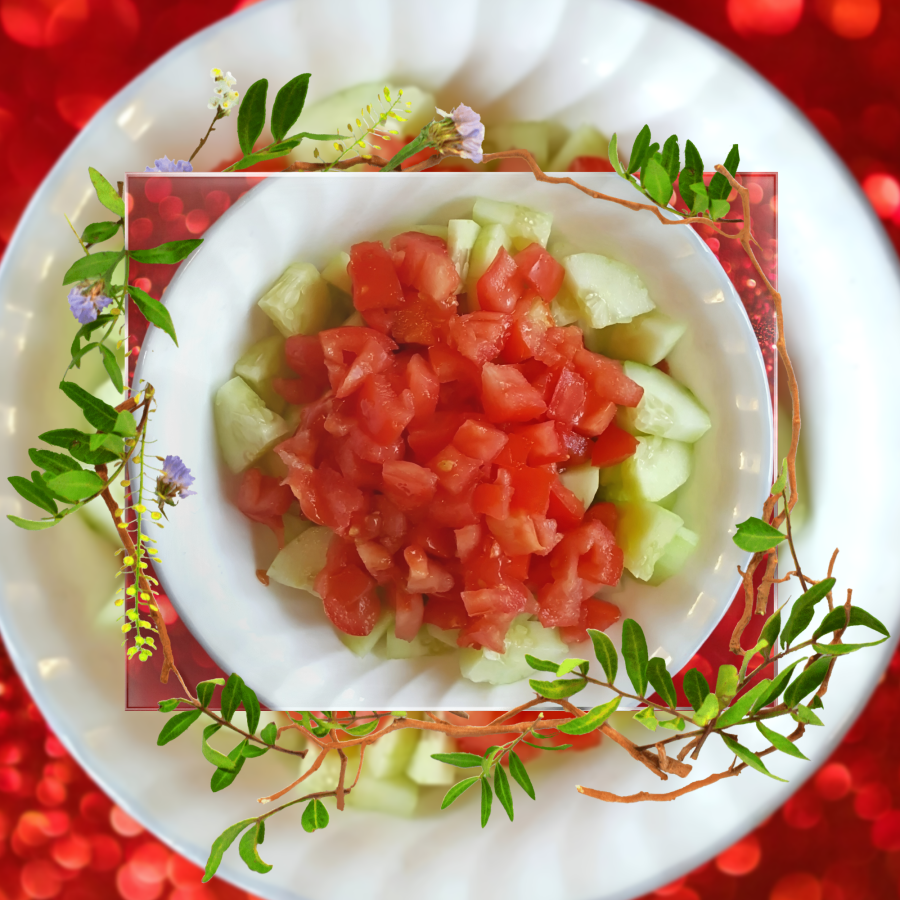
(CC BY-NC-SA 4.0) with Photo Studio Pro edits
You can see what I don’t do this recipe as often because once you add a dollop of mayonnaise on top, you’ll know why the time-consuming dicing is better. This is one of my favorite summertime meals, but it’s good anytime of year if you can get the veggies. Because of advances in food transport, most of the world can get products at any time of year.
So this is my first post for November’s recipe month, and my first post using a PIP (Picture-in-Picture) filter. I had a kaleidoscope image behind it like the one I did on my Flickr, but I decided the red bokeh lights made a nicer background where you can still see the bowl from the original image clearly.
So the recipe is simple, and you can see it just by looking. Dice up your favorite type of tomato (I like Roma or pear tomatoes best), then slice and dice up a cucumber. Mix or layer them in a bowl and sprinkle some salt on top. Optionally, mayo or salad dressing are quite tasty, but if you want to treat this tasty bowl like a healthier-than-popcorn movie snack, toppings are messy, so bring a fork. 🍴
But no talk of cucumbers and tomatoes is complete without a mention of Larry the Cucumber and Bob the Tomato from the VeggieTales videos. If you’ve never seen the amazing and creative animation by these folks, you’re in for a treat. You don’t have to be a kid to enjoy humorous ways of learning God’s Word. Here’s one of the very first ones I ever saw:
If you watched to the end, you saw the Qwerty (the computer on the countertop) gave them the verse from Colossians 3:13b. Here’s the whole verse …
“[13] Bear with one another and forgive any complaint you may have against someone else. Forgive as the Lord forgave you. ”
And since you’ll probably need to bookmark this post with the video embed being much longer than usual, here’s another longer one for good measure because, well, doesn’t everyone love Silly Songs with Larry?
If you’re in a hurry, fast forward to 4:18 or just click that timestamp to go right to the best song ever written about hairbrushes. 😂 🪮
Share this post on:

Prompt Response: Exploring Food Experiences

with help from Gemini Nano Banana and Photo Studio Pro app
What’s the best way to explore a new city?
Discovering New Foods
What’s the best way to enjoy a new city? Find an eatery that’s not part of a chain you can visit most everywhere else.
Traveling with Park Way Studios — Wisconsin
One of the first locations I worked in with Park Way (after my training in four really small towns in Utah) was a place called Pardeeville, Wisconsin. Yes, that’s really the name of a town, and it’s small but pretty. I didn’t have my car yet, so I was at the mercy of the hotel cafe until a co-worker joined me a few days after I arrived. Once we had wheels, we asked locals about things to do in the mornings before we saw customers and on Sundays when we had no bookings. Well, and for dinner if we finished the day’s appointments early enough.
I don’t remember if we got a recommendation or just found this amazing restaurant by driving around the area, but the meal there changed my palate from that point forward. The little place on Lake Wisconsin in Lodi is called Fitz’s By the Lake, but then it was the Okee Snack Bar. We couldn’t understand the two-hour wait until we tried the food, and then it made perfect sense. The special for that night was blackened prime rib.
So, understand my backstory of being raised on “Hamburger Helper” and other inexpensive meal options. The only time I’d tried prime rib was as a treat during a trip to Disneyland for my birthday. And it didn’t impress me at all. Plus, I’d never even heard of blackening seasoning at that time, so it was an amazing culinary experience. Every bite of food there was filled with more flavor than I think I knew food could have—including the sizzle of fresh blue cheese on my salad, which was another first for me.
Since that trip, I have never wanted my prime rib any other way. Years later, when hubby and I used to visit O’Charley’s for their Sunday prime rib special, I would eat it as served with au jus until one night when I saw blackened salmon on the specials board and remembered Okee Snack Bar. I asked if it was possible to get it on my prime rib, and the server didn’t know, but checked. As it turned out, the cook was interested in trying it for us to see how it worked, and everyone was impressed. From then on, that’s how we ordered it, and the servers often vowed to try it that way once they saw it on our plates. Eventually, it became a menu item, and I’ll never know if it was because of our orders, which would ultimately mean it was because of that out-of-the-way restaurant in Lodi, Wisconsin.
Traveling with Park Way Studios — Indiana
But sometimes, it doesn’t take a restaurant to find a new culinary adventure. Sometimes, it’s just about being a friendly and patient person who meets another friendly and patient person. In my case, it was a beautician who spent six hours putting a perm in my very long (at the time) hair. I want to say she used about 300 perm rods, but if not that many, it was a lot. I let her experiment with crisscrossing them to add texture and other ways she just had fun with my hair. Fortunately, she also used a high protein solution and after-perm treatment that my hair really liked, so the six hours was worth a wonderful and long-lasting permanent.
The town where I met her was the town of La Porte, Indiana, where much of the movie “Prancer” was filmed. I learned that tidbit along with lots of other fun information as beautician and client filled up chair time getting to know all about each other. If I had ever become a beautician, I would likely have been just like her in sharing about her husband and kids and favorite foods. That last conversation actually led to an invitation to dinner with her family.
Since the dinner was on a Sunday afternoon, and we’d already become fast friends at the beauty shop, she invited me to spend the whole day. While I was there, I learned how to make my next culinary delight: fresh salsa. She made it totally from scratch, right down to roasting Roma tomatoes in the broiler at the bottom of her gas range. (No, that drawer at the bottom of your oven wasn’t always used for storage. 😁 And I miss the wonderful flame-kissed steaks that could be made in those old broilers.)
Homemade Salsa Recipe 🍅🌶️🫑🧅🧂🍋🟩
If you want to try your own hand at making homemade salsa, I can give you the basics, but I’m not one who measures, so you’ll have to go by the taste that works for you. Ingredients in approximate amounts include…
- 5-6 ripe Roma tomatoes — roasted and hand crushed
- One half of a white onion — diced small
- 1 small jalapeño pepper without seeds — diced extra small
- One fourth of a green bell pepper — diced medium
- 1 cup chopped cilantro — finely chopped
- Chili powder and garlic, salt, or others seasonings to taste
- A few squeezes of lime juice is optional
Broil the tomatoes until the skin just starts to turn black. It makes it easier to peel them as you crush them between your hands and fingers. Plus, a little of that roasted flavor stays with them. Place some of the roasted tomato meat with the jalapeño seasonings in the blender and mix them into a puree to sauce to your bowl of salsa. The rest of the ingredients can stay chunky. Once you have it all mixed together, cover it and refrigerate it until chilled and ready to serve.
It’s been years since I’ve made this because hubby doesn’t like cilantro and because I no longer have a gas stove. I want to see if I can make it in a counter top oven/air fryer someday, but no matter how it comes out, it doesn’t replace the joys of exploring a new city, making a new friend, and learning a new recipe all in the same day.
Share this post on:

Cliché Month: Don’t Judge a Book by Its Cover

Don’t Judge a Book by Its Cover
That’s the classic advice we celebrate for National Book Lovers Day on August 9th of each year since 1995. Note: The link goes to a page for 2023, but it’s the only one that gave a history. It also has some great quotes about reading like…
“A reader lives a thousand lives before he dies. The man who never reads lives only one.” – George R.R. Martin
Appearances can be deceiving, though, and the true value of any story lies within the content of its pages. I agree… especially if that book happens to be a recipe book.
That makes my mind immediately jump to that classic Twilight Zone episode, “To Serve Man.” The Earth welcomed nine-foot-tall alien visitors called the Kanamits with open arms, largely because of a book they left behind with that noble-sounding title. Humanity judged the book entirely by its cover! Spoiler alert: If anyone had taken the time to actually peruse the pages inside—and decode a bit of the Kanamit language first—they would have realized long before it was too late that it wasn’t a manual for goodwill… it was a cookbook, and humans were the main course. 🙃 Here’s a quick clip from the episode:
The Proof in the Pudding
Thankfully, the recipe books in my home don’t require a government cryptographer to decipher, and their intentions are far more wholesome!
Whether it’s a cookbook, an instruction book, or a novel, every bookworm knows that the proof isn’t just in the reading—it’s in the application. What do you do with the words you read? A quote I’ve always liked says…
If all else fails, read the instructions — attributed to Agnes Allen.
When I first saw that quote over 40 years ago, it was appended by the followup instruction: And if that doesn’t work, follow them. That’s great advice since all the pretty recipe pictures and yummy ingredients won’t mean nearly as much if they’re never matched with a bowl and a mixing spoon. The Bible puts it this way:
James 1:22 BSB
[22] Be doers of the word, and not hearers only. Otherwise, you are deceiving yourselves.

https://bible.com/bible/3034/jas.1.22.BSB
Once you make a cozy bowl from a trusted set of instructions, the true value of that book is undeniably in the taste. As another idiom says, The proof is in the pudding. (Which is wonderfully convenient, since August 9th is also National Rice Pudding Day!)
Turning the Page with Comfort Food
This is actually a perfect mashup of holidays—nourishment for the soul and nourishment for the body. One of the many “Today is special because…” sites I visited mentioned that most bibliophiles have more unread books than read books. I resemble that remark. 😁 And that even includes recipe books. That’s partly because I’m more apt to play in the kitchen and try to create something than I am to follow a detailed recipe.
For example, I’ve never made rice pudding, but one of my favorite experiments while looking for ways to sweeten food without sugar resulted in making fried apples with banana. Here’s a picture:
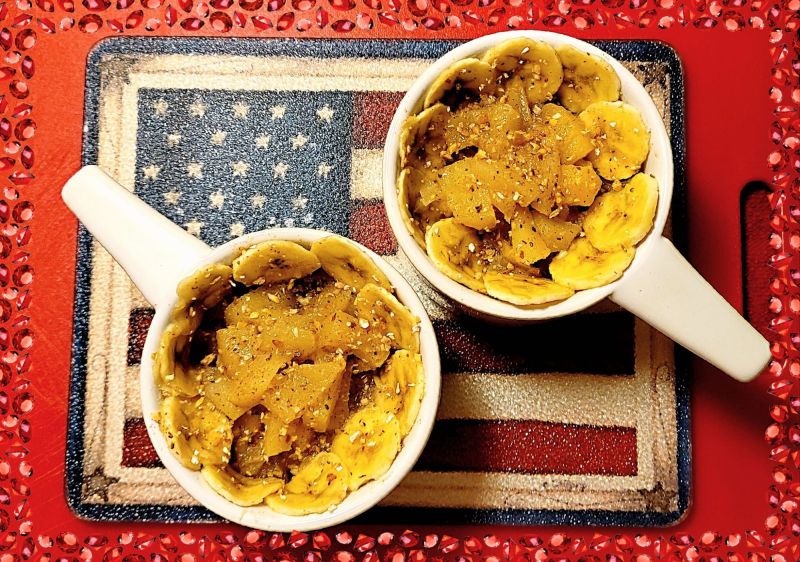
by Crystal A Murray (CC BY-NC-SA 4.0)
By caramelizing the bananas and butter directly into apples already sizzling with butter and cinnamon, you get the absolute perfect sweetness without needing added sugar. (Just a tiny touch from the vanilla bean paste!)
Tasty Fried Apples with Banana
- Apples ( I Prefer Honeycrisp Plus One Fuji or Gala; Peeled and Sliced)
- Banana (Mashed)
- Butter (Generous Amount Based on How Many Apples)
- Ground Cinnamon (To Taste; I Recommend Ceylon over Cassia)
- Vanilla Bean Paste (To Taste/About ¼ TSP)
- Optional Misc Spices Like Nutmeg and Allspice (To Taste)
- Optional Topping (Toasted Oats, Flax, Toasted Pecans, etc.)
Instructions: Melt butter in a skillet over medium heat. Add the sliced apples, cinnamon, and a touch of vanilla bean paste, and a little water for steam. Cover and simmer until the apples begin to soften and caramelize. In another skillet, add the bananas and mash them with butter until they create a puree. Mix the puree with the caramelized apples and allow the whole mix to brown and caramelize a little more.
Serving Suggestion: Spoon into oven-safe bowls and sprinkle with your chosen topping. Put in a warm oven until time to serve. In my picture, you’ll notice I decorated the bowls with some thin slices of banana before adding the topping. But it was fine without the banana slices or crunchy topping. I think I was just trying to get a fancier picture like my efforts using 2 cutting boards. Whatever your method, please come back and add a comment to let me know you’ve tried them and what you think. Hubby used to like them better than most of those served in restaurants, but he cannot have any banana anymore. (Potassium is a no-no without kidneys.)
And with that, I bid you good reading and good eating. 📚🍮
Share this post on:

My Latest Flickr Photos


Others’ Posts I’ve Liked


